-
Shopping cart is empty
-
x



-
Shopping cart is empty
-
x
-
Where to start
Where to start? Start with cyanotype
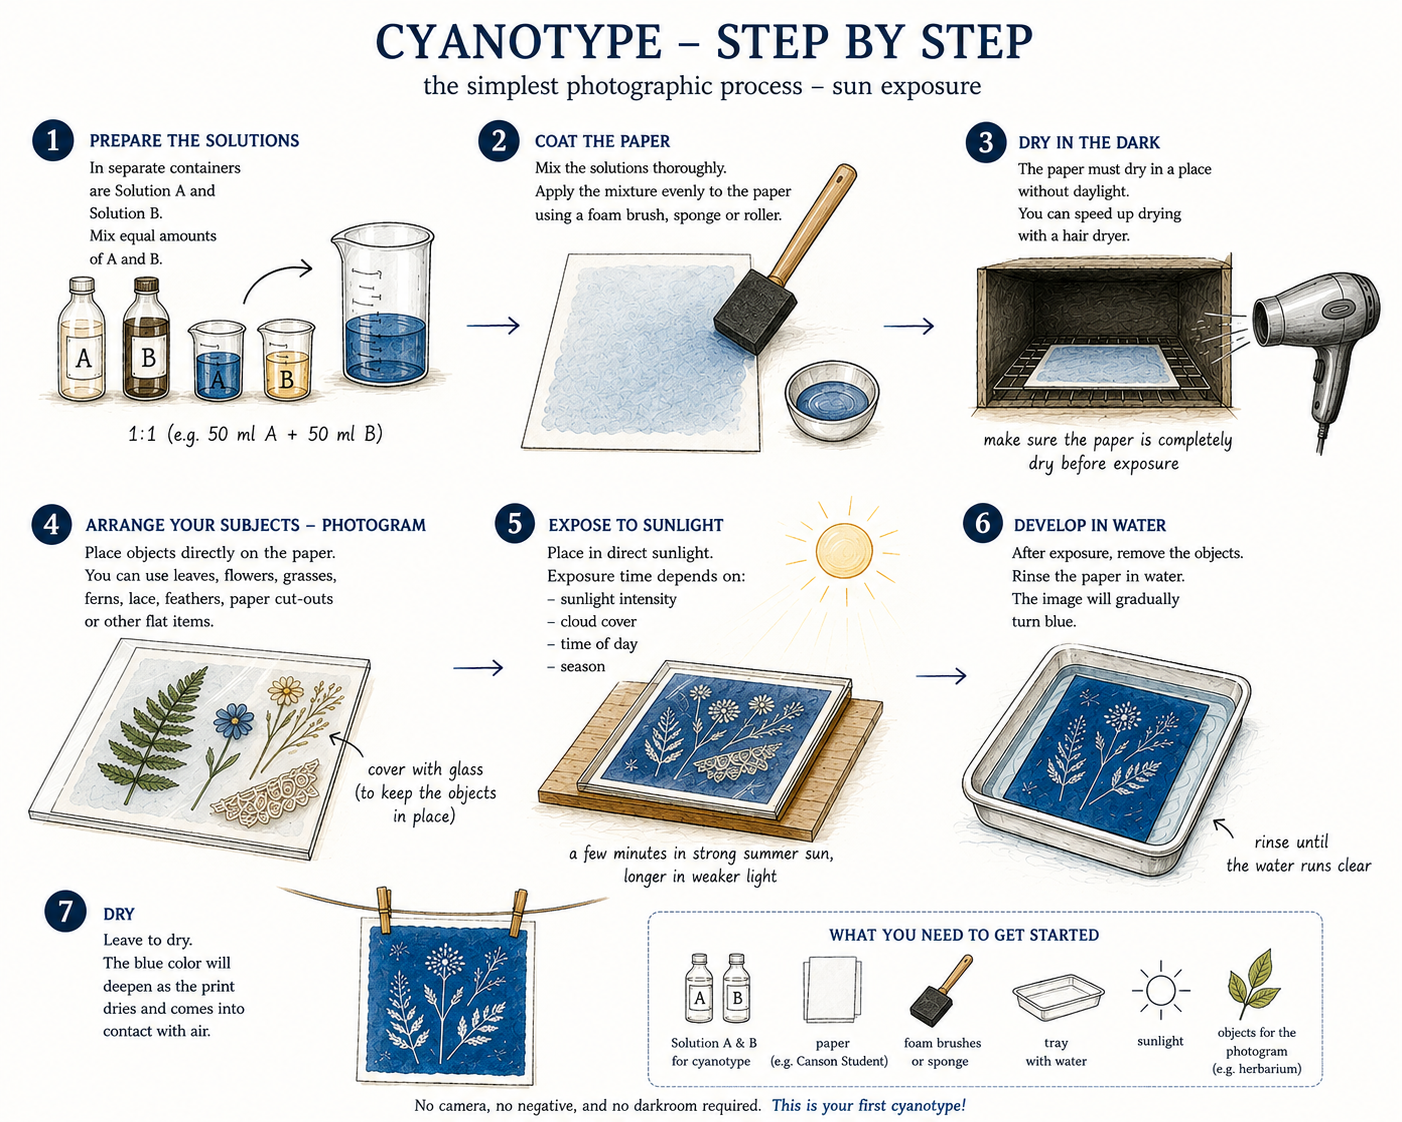
If you are just beginning your journey with historical and alternative photographic processes, cyanotype is a great process to start with. You do not need a photographic darkroom, an enlarger, or any specialist equipment. You can make your first print at home and expose it simply using sunlight.
You will need paper, cyanotype solutions, water, and a room without daylight where you can coat and dry the paper. This could be a windowless bathroom, for example, or any other room that can be darkened.
Before use, mix equal amounts of Solution A and Solution B. Apply the mixed solution evenly to the paper using a brush, sponge, or roller. The sensitised paper should be dried away from daylight. If you want to speed up this step, you can use an ordinary hair dryer. The paper should be completely dry before exposure.
Don't have a negative? Start with a photogram
You do not need a photographic negative to make your first cyanotype. You can start with a photogram – one of the simplest ways of creating a photographic image without using a camera.
A photogram is made by placing objects directly onto sensitised paper and exposing them to light. The objects block the light completely or partially, so after washing the print, their pale shapes remain visible against the characteristic cyanotype blue.
Leaves, flowers, and grasses are perfect for your first experiments. For example, you can create your own cyanotype herbarium: collect and dry plants, then arrange them on the prepared paper. The flatter they lie against the surface, the sharper their outlines will be. Lace, feathers, paper cut-outs, transparent and translucent materials, and small objects found around the house can also produce interesting results.
Place your composition in sunlight for exposure. It is a good idea to cover it with a sheet of glass to hold the plants or other flat objects firmly against the paper and prevent them from moving during exposure.
How long should you expose a cyanotype in sunlight?
There is no single exposure time that works in every situation. It depends primarily on the amount of UV radiation, so it will vary according to the intensity of sunlight, cloud cover, time of day, and season.
On a bright summer day, the exposure will be much shorter than in winter, in the morning or late afternoon, or under cloudy skies. When making your first prints, it is therefore worth experimenting with exposure times and observing the results.
After exposure, remove the objects or negative and wash the print in water. This removes the remaining unexposed light-sensitive compounds, while the image begins to develop its characteristic blue colour. The blue will deepen further as the print dries.
And there you have it – your first cyanotype. No camera, no negative, and no professional darkroom required.